

Innovate, Create, and Inspire: Your Gateway to Arduino Projects.
Embark on a journey of limitless possibilities with NodeMCU ESP8266. From home automation to IoT applications, this versatile microcontroller empowers you to connect, create, and control your world like never before.
Designed to measure temperature and humidity with accuracy and reliability, this versatile sensor opens up possibilities for climate monitoring, and weather forecasting projects.
Whether you're designing a smartwatch, IoT device, or simply adding visual feedback to your projects, the OLED 4Pin module delivers stunning clarity and flexibility.
This cutting-edge technology utilizes sound waves to measure distances with remarkable precision, enabling a myriad of applications in robotics, automotive safety, and smart infrastructure.
Unleash Your Inner Maker: Start Your Arduino Projects Journey Today!
With Arduino Software interface and library of code examples, Arduino Software empowers students, and professionals alike to explore electronics and programming with confidence.
DownloadInstalling the digital highway: Setting up the USB driver for seamless connectivity. Embrace the journey of configuration, where precision meets compatibility.
DownloadInstalling the digital highway: Setting up the USB driver for seamless connectivity. Embrace the journey of configuration, where precision meets compatibility.
DownloadInstalling the digital highway: Setting up the USB driver for seamless connectivity. Embrace the journey of configuration, where precision meets compatibility.
DownloadTransform Your Ideas into Reality: Discover Arduino Projects Galore!
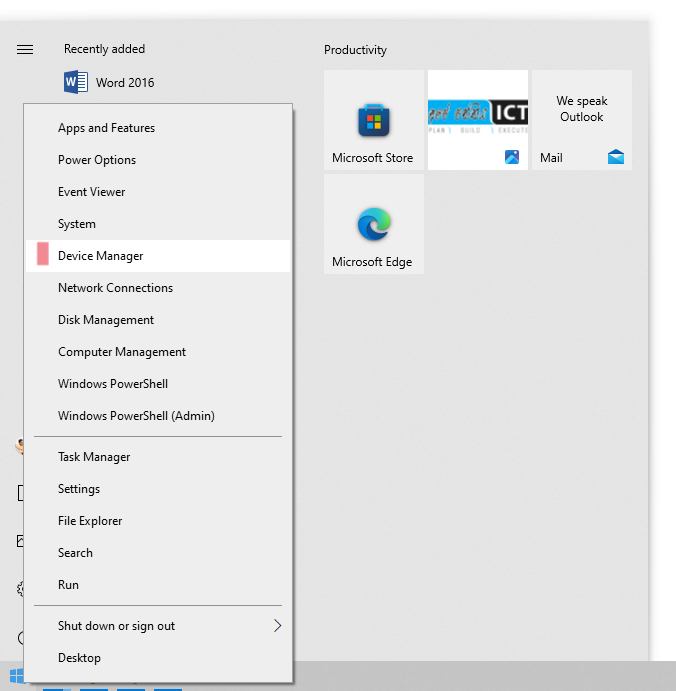
Step 1
Go to Device Manager using Windows search or like the below image
Step 2
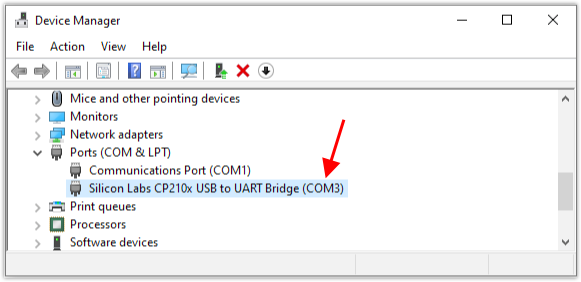
Identify the COM Port from Device Manager
Step 3
Node MCU ESP 8266 Additional boards Manager URL:
https://arduino.esp8266.com/stable/package_esp8266com_index.json

Step 4
Let's Install Our NodeMCU ESP8266 Board

Step 5
Search "esp8266" on Search Bar and Install it.

Step 6
After Downloading, Select the NodeMCU 1.0 (ESP-12E Module)

Step 7
Now your NodeMCU Board is Selected.

Step 8
Now your COM Port is Selected.

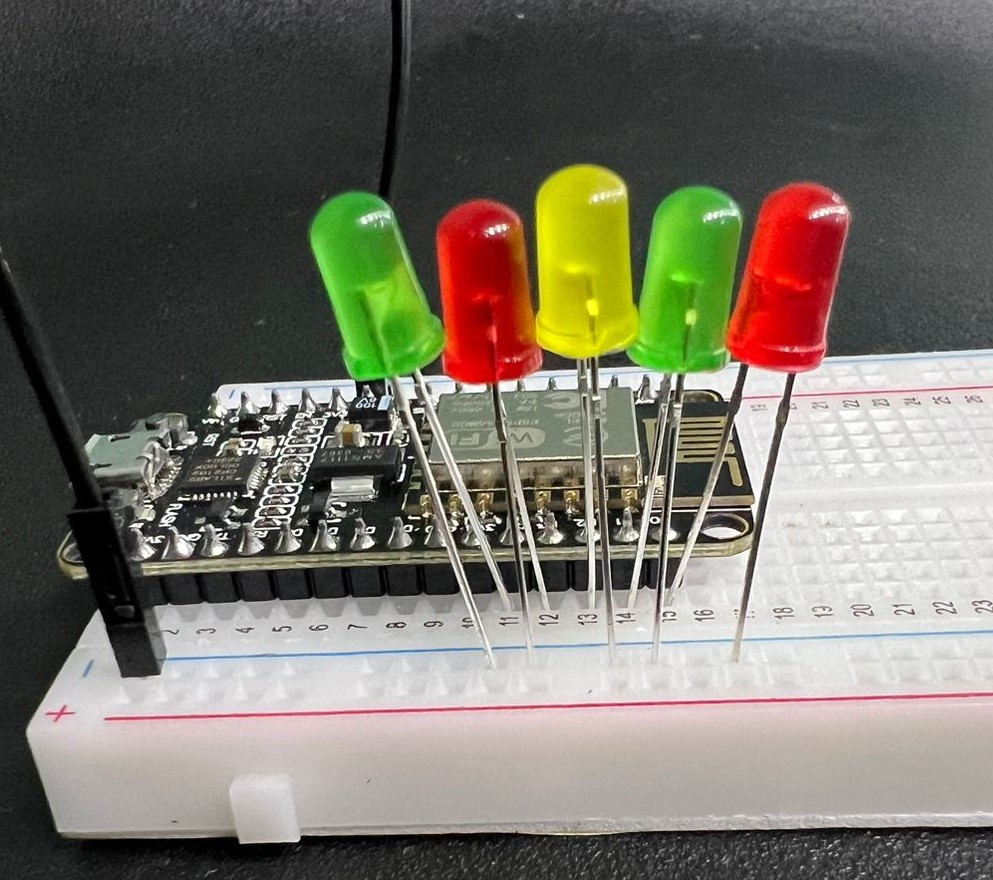 |
LED Knight Rider Practical with NodeMCUView LED Knight Rider Testing Code Here. View |
 |
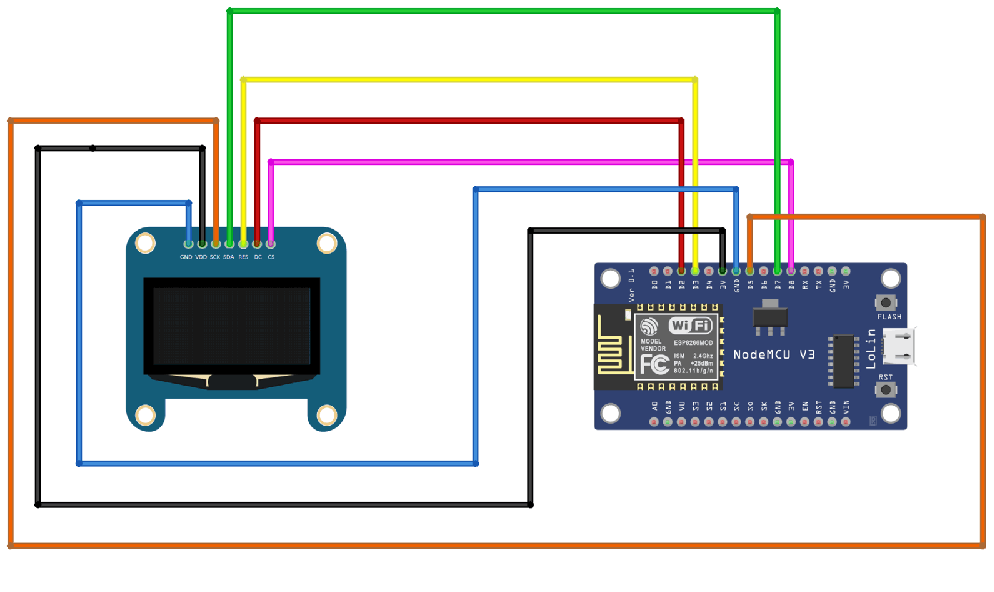
4 Pins OLED - Connection with NodeMCUView 4 Pins OLED Testing Code Here.
Install: View |
 |
7 Pins OLED - Connection with NodeMCUView 7 Pins OLED Testing Code Here.
Install: View |
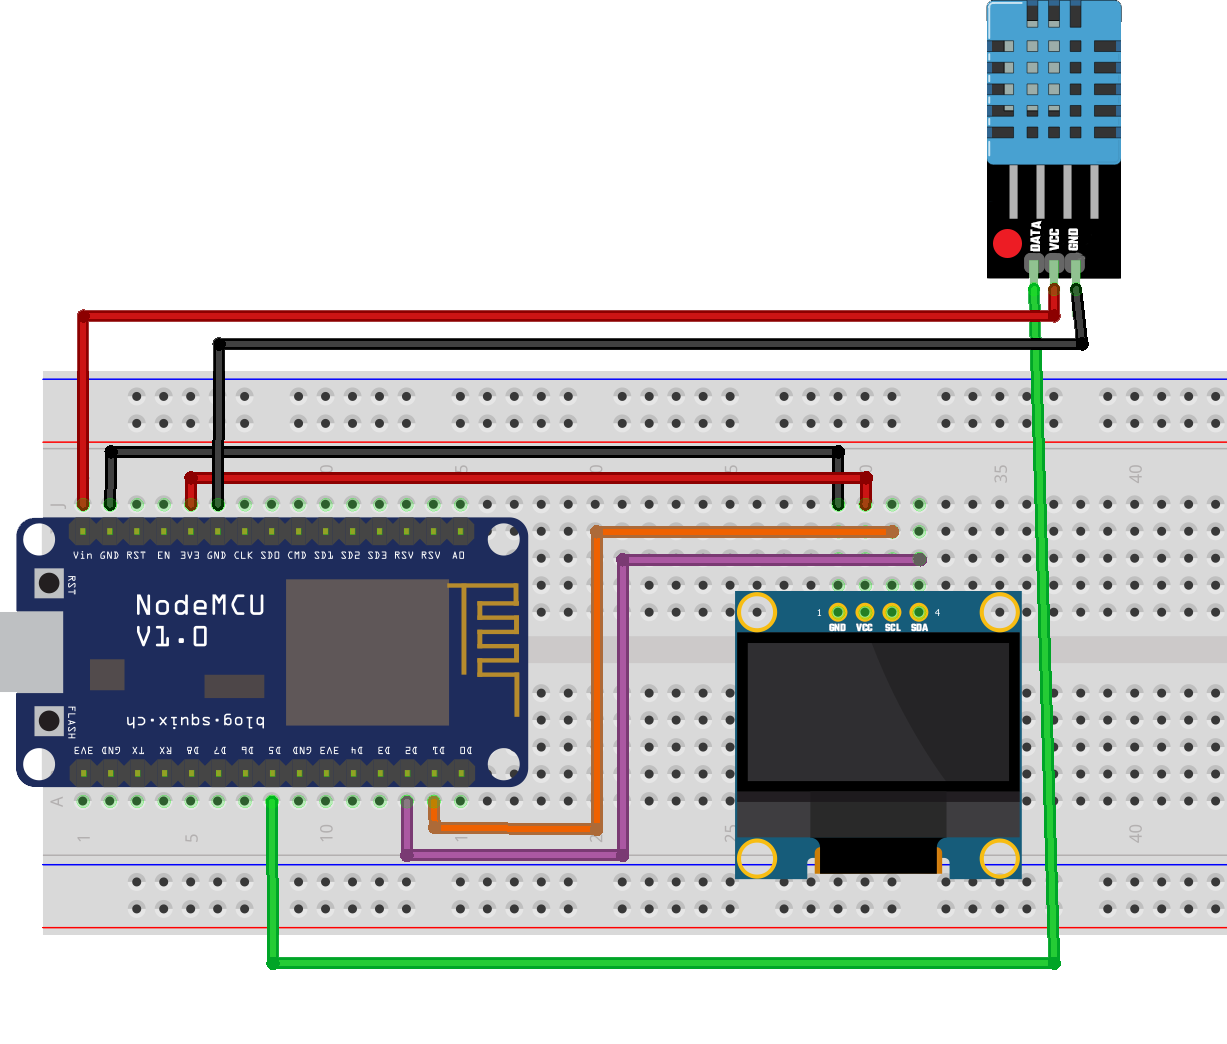 |
Simple Weather Widget Using Node MCU, OLED and DHT11 |
 |
Simple Weather Widget Using Node MCU, OLED and DHT11 |
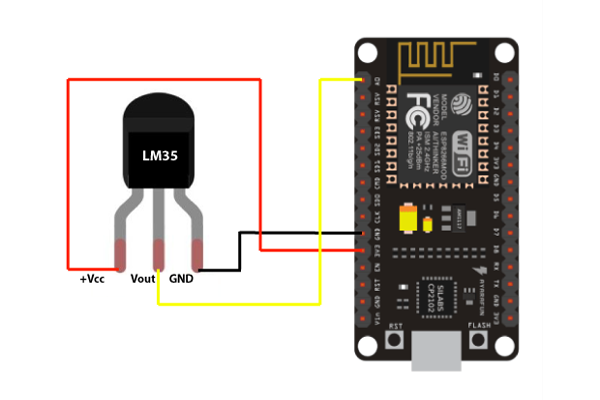 |
Temperature Controlled Fan Using Node MCU, Relay, Fan and LM35View Temperature Controlled Fan Project Code Here. View |
 |
Distance Calculator Using Node MCU, OLED and Ultrasonic Sensor module
|
 |
Distance Calculator Using Node MCU, OLED and Ultrasonic Sensor module
|
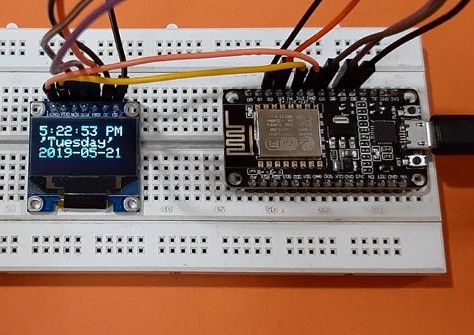 |
Digital Clock (Online Time/Date) Using Node MCU, and OLED |
 |
Digital Clock (Online Time/Date) Using Node MCU, and OLED |
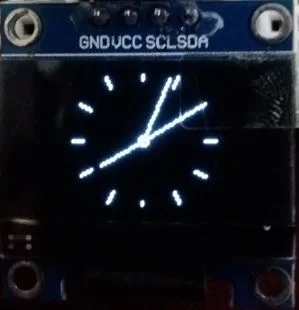 |
Analog Clock (Online Time/Date) Using Node MCU, and OLED |
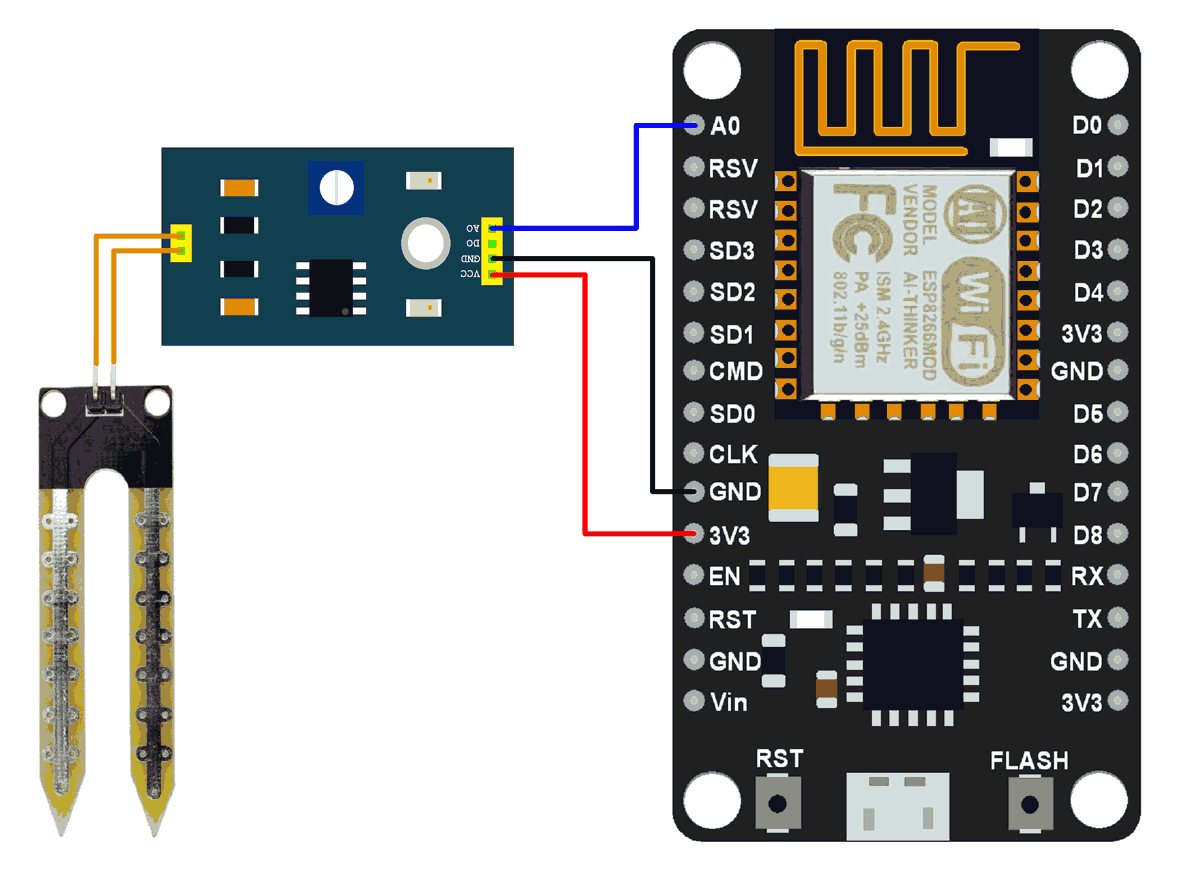 |
Soil Moisture Sensor Using Node MCUView Soil Moisture Sensor Project Code Here. View |
 |
Smoke Sensor Alarm Using Node MCUView Smoke Sensor Alarm Project Code Here. View |
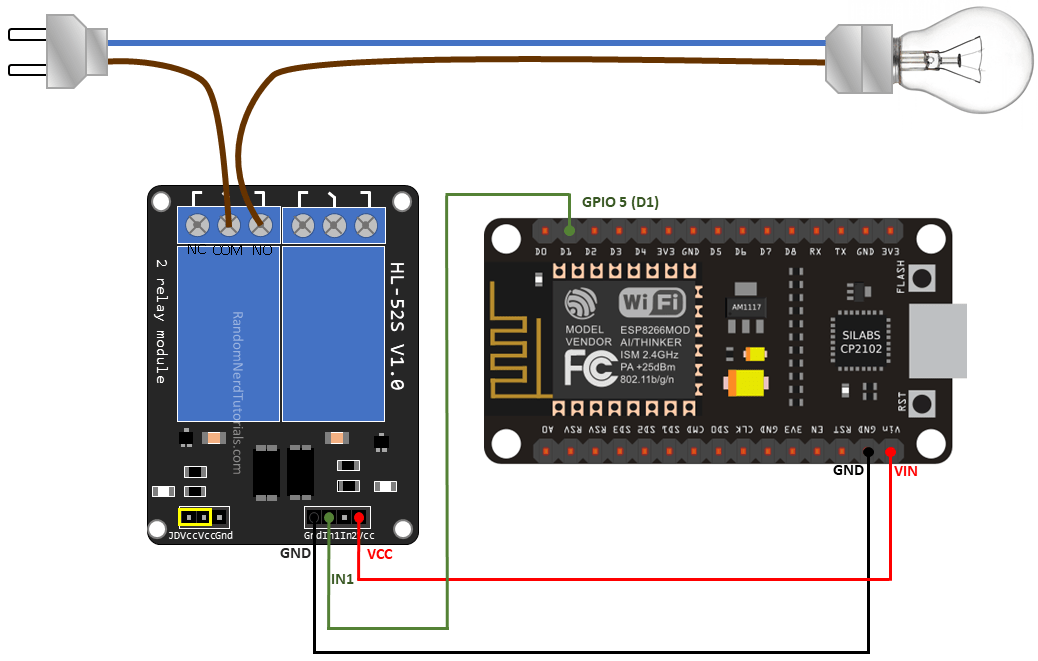 |
Simple LED Control With Blynk, Relay Module and NodeMCU Esp8266View Blynk Project Code Here. Install: View |